Making A Map
Alameda County is deploying MyDistricting, an interactive online application for the public to submit Communities of Interest areas and to submit proposed 2021 redistricting maps.
How to use MyDistricting
- Create a username using your email address and password.
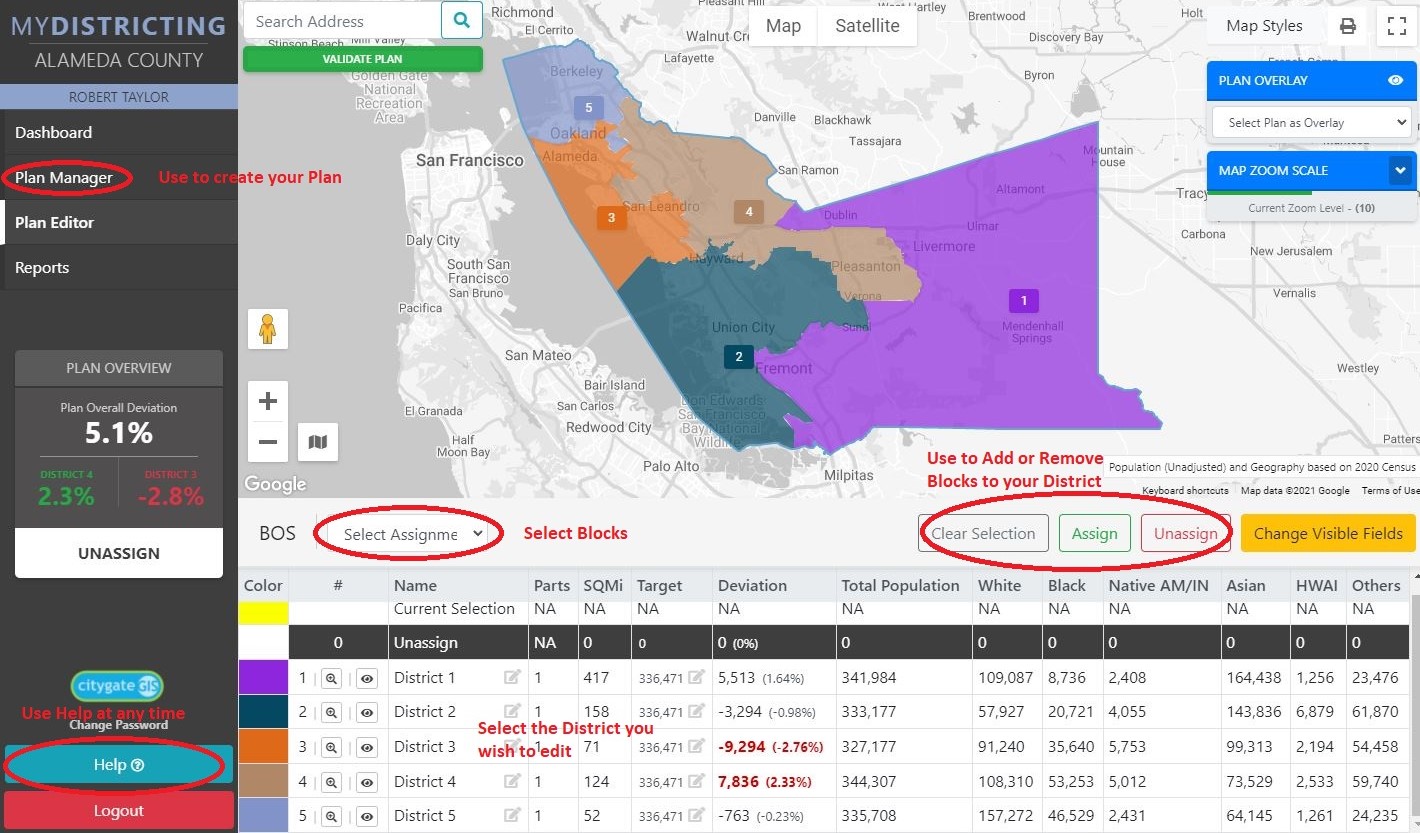
- Once in MyDistricting, select “Plan Manager” on the left side of the application.
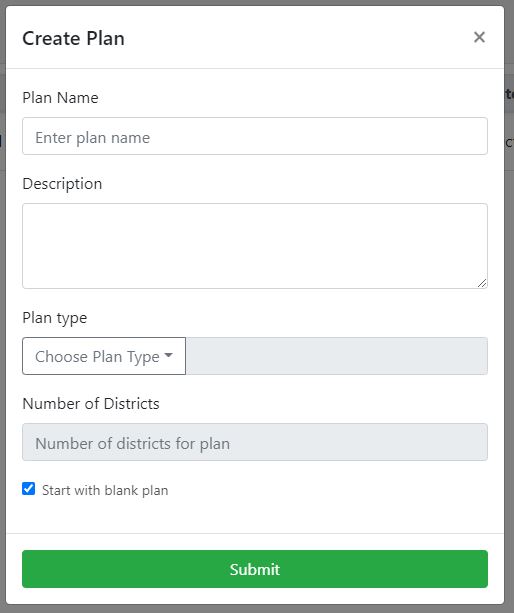
- In “Plan Manager”, select “Create Plan”.
- Give your plan a Name
- Give your plan a Description
- In “Plan Type”, select “Supervisorial_CA_Adjusted, Visualization_A, Visualization_B, Visualization_C, or Visualization_D”
- Type “5” for “Number of Districts”
- Uncheck “Start with blank plan”
- Select the “Submit” button
- In “Plan Manager”, select the “Open” button associated with your newly created Plan. You will now be able to create your Districts.
- In the “Select Assignment Layer” dropdown at the lower left corner of the map, select “Blocks”. These will be used to create your Districts. Zoom to your desired location. Layers (County, Tracts, Block Groups, Blocks) are scale dependent and will appear the more you zoom in. Only Blocks can be selected to create your Districts.
- In the table below the map, mouse click on the District you would like to edit (e.g. District 2) to make it active. In the map, select a Block (or select many Blocks by holding your Shift key while moving your mouse over desired Blocks, like a paintbrush. No mouse clicking required.) that you would like to add or remove from a District. When a Block or Blocks are select, use the “Assign” button to add the selected Blocks to your active District. Alternately, select the “Unassign” button to remove the selected Blocks from your active District.
- When you are finished with your edits, go to “Plan Manager”, select the “Verify” button and then select the “Submit Plan” button to submit your Districts to the administrator.


Submitted Maps
Application Instructions:
How to view submitted Board of Supervisors Districts using our online application
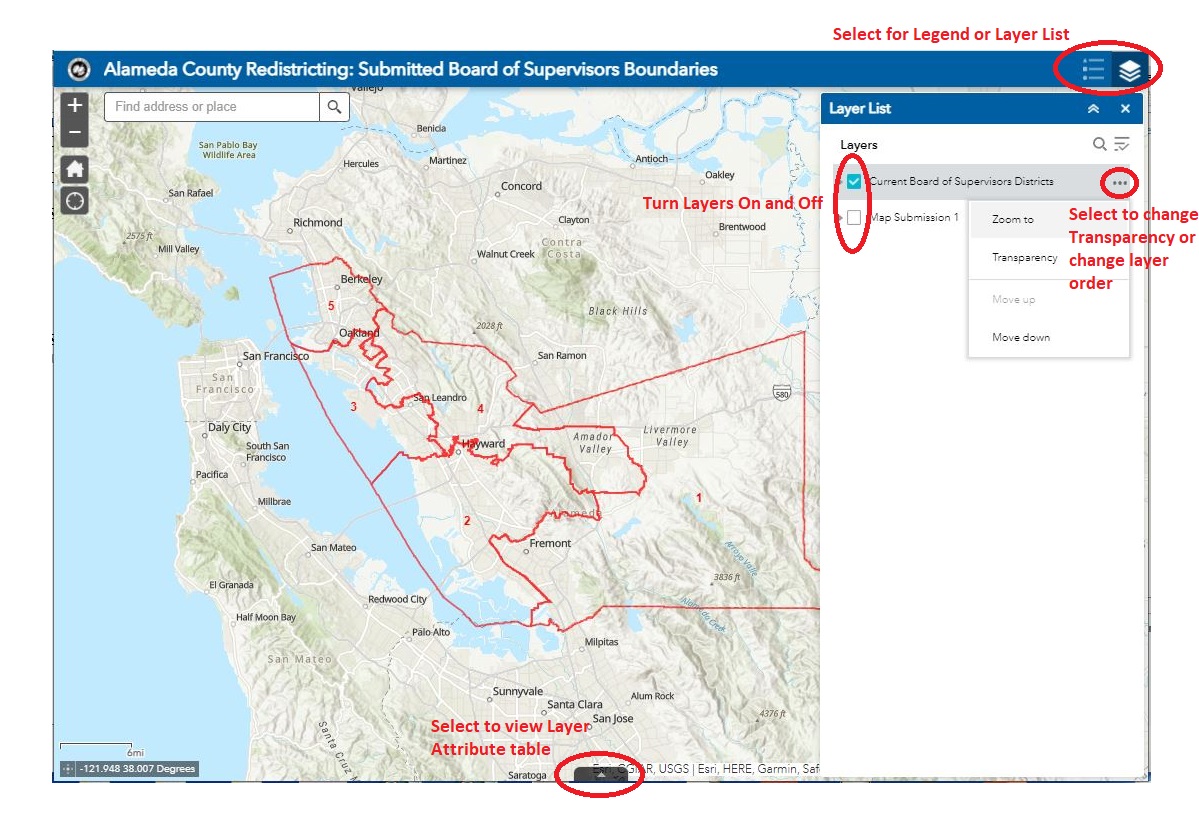
Step 1: Click the “View All Submitted Maps” button.
Step 2: Click on the “Layers List” button on the upper right-hand corner of the application to see all submitted maps. Turn on layers that you wish to view.
Step 3: Click the ellipsis next to the layer name to adjust layer transparency or to move the layer above or below other layers.
Step 4: For additional information about the Districts on the map, click on a desired location or select the “Open Attribute Table” tab on the bottom of the map.

Submitted PDF Maps
Stay Connected
Sign-up to get email updates.

